![]()
| Prompt composer offers a systematic approach in
composing text prompts (prompt = cue + modifiers) for text-to-image AI generators. You will be offered collections of short
descriptive texts (cues) and collections of modifiers, like a painter, art style, time
period, etc. After composing a prompt you can copy (blue copy icon) and paste it into your
favourite web text-to-image generator and see to result in your browser.
Although the strong side of Scripthea is when you use API access to
some generators (only local install of Stable Diffusion for now).
You can start with generating single images just probe the ground and have the initial appreciation of the generation process. |
The prompt, SD parameters and the picture become part of
your image collection (image depot) with a convenient image viewer on the second tab.
On top of that, you can "scan". After selecting some cues and some modifiers
Scan will combine them following some rules, query the active image
generator and save the generated images in an image collection . So
for example if you would like to see how a particular painter would
paint different subjects (cues) or how specific topic would be
painted by different painters.
In order to create your own text-to-image style you need to try as many cue&modifiers combinations as you can (or have passion to). My experience is that you start from 1% to 3% of generated images worth upscaling and keeping and after experimenting with thousands of images you get to 5% - 10%. |

On the left, you see the log panel which will text you about any ongoing operations. If the wobbling vertical line is too much of distraction for you, double click on it to hide it.
For cue composing, there are two modes: Single and Scan.
In Single mode
(see above), you
can use one cue and more than one modifier in a row.
After you have the desired prompt there are two possible ways to proceed:
The cross arrows button
above the cues will select a cue in random for you (only
in single mode). |
In Scan mode (see
below), you can select any number of cues (from text collections)
and any number of
modifiers. but each prompt will combine only one cue with some modifiers
(see modifiers).
Notice that check boxes in cues lists are now square, not round (radio checkbox) as in single mode.
Scan mode works better with API and all the images from the scan will
be added to current image depot. Modifiers are divided into categories and the categories switchable from the checkbox above. You can activate a modifier in two ways. From disable (empty square) you can go to Fixed (F) or Scannable (S). Fixed type modifier will be present in all generated by Scan prompts. The number of included in a prompt Scannable modifiers is defined as modifiers scan modif. samples # (modifiers options). As modifiers are often used, there are convenient ways to manipulate them: left/right mouse click on the left of modifier will change modifier active type. Another way to change that type is with keyboard going up and down with the usual keys and once you select your modifier change the type with left/right arrow keys or Enter key. More information about individual modifiers: you can hover over one and there will be a hint OR right click on modifier (the text) will open dialog invitation to google that modifier. After selecting some cues and modifiers (fixed and scannable) you can click scan preview to see all the potential prompts for this scan. Then you can select only ones you like or query them one by one. |

Scan mode of Scripthea - it will combine all selected cues with all selected modifiers in some (rules applied) fashion.
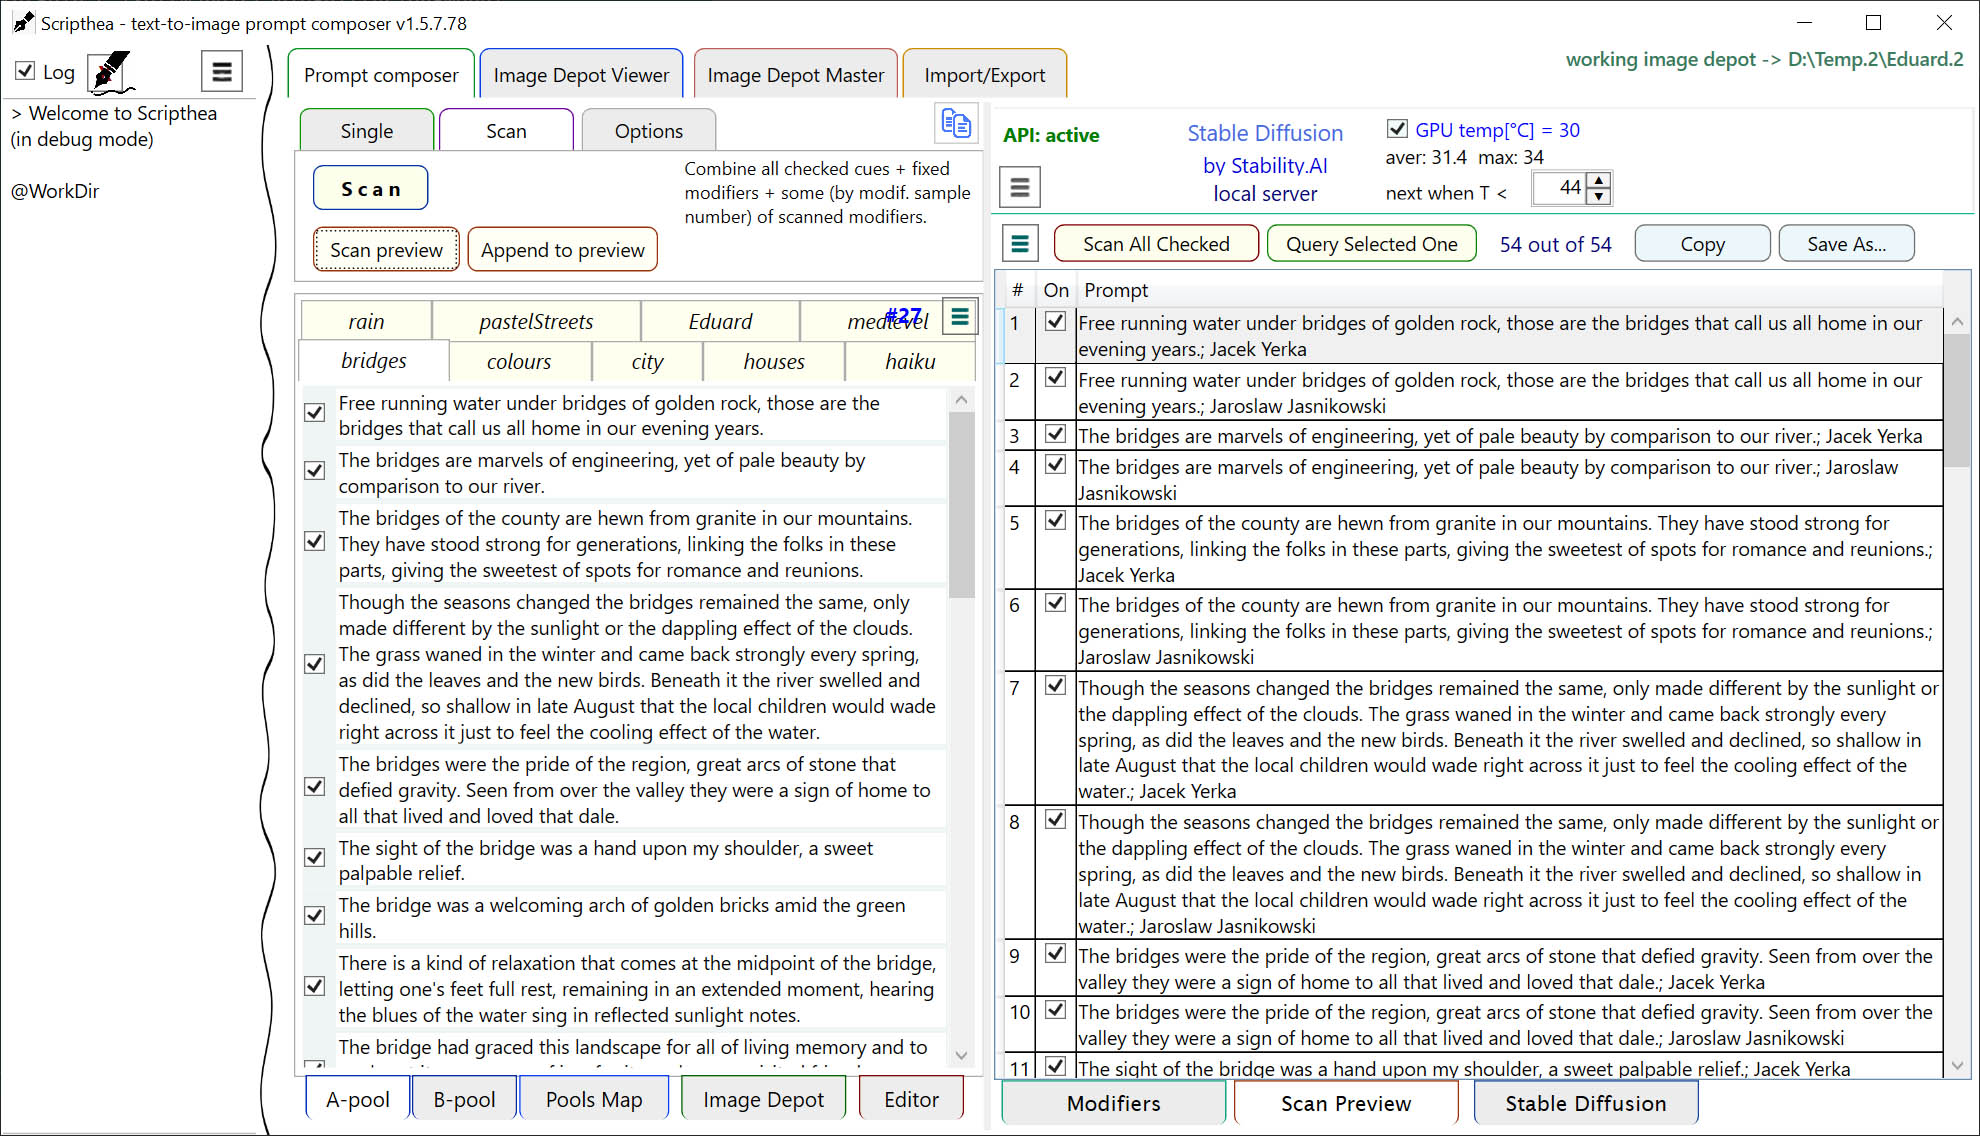
Scan Preview table in Scripthea
allows you to preview the potential prompts as well as select subset, copy them
to clipboard or save them in a text file.
You can combine variety of sources (e.g. cues pool and image depot) in one
prompt list using Append to preview button.
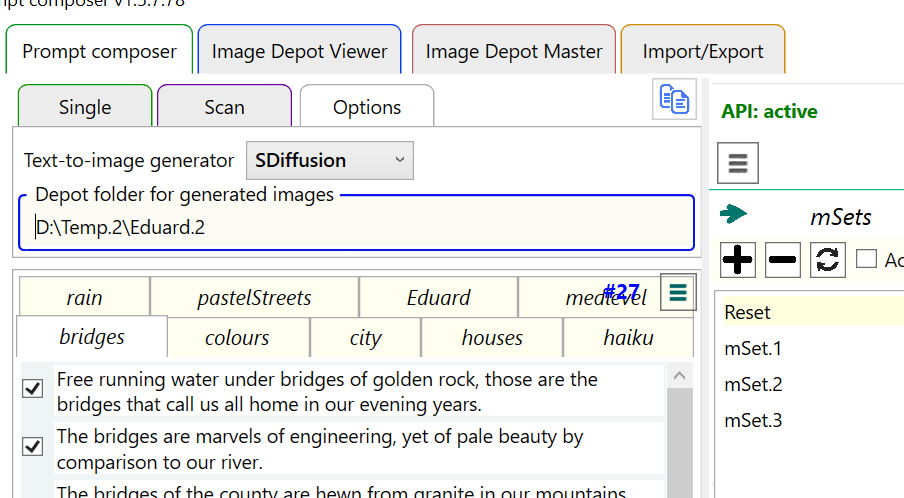
| Options tab allows you change
the working image depot
folder, and select of the active image generator.
Changing working image depot folder. When you turn to Options page the left panel on the main form will turn to Directory tree. There you can navigate the usual way and when you reach the desired folder double click on it to be set as working depot folder. In the directory tree the folder are color-coded: black - no images; blue - some images are present but it is not a depot folder (DESCRIPTION.idf is missing); green - it is a image depot folder and if you hover over it you can see how many images are in there. The same fashion of folder picking is applicable everywhere you need to choose a folder. If there are more than 1 box for folder make sure that the one you would like to change has the focus (blue frame around).
|
Choosing active text-to-image
generator At the present you have three options:
|